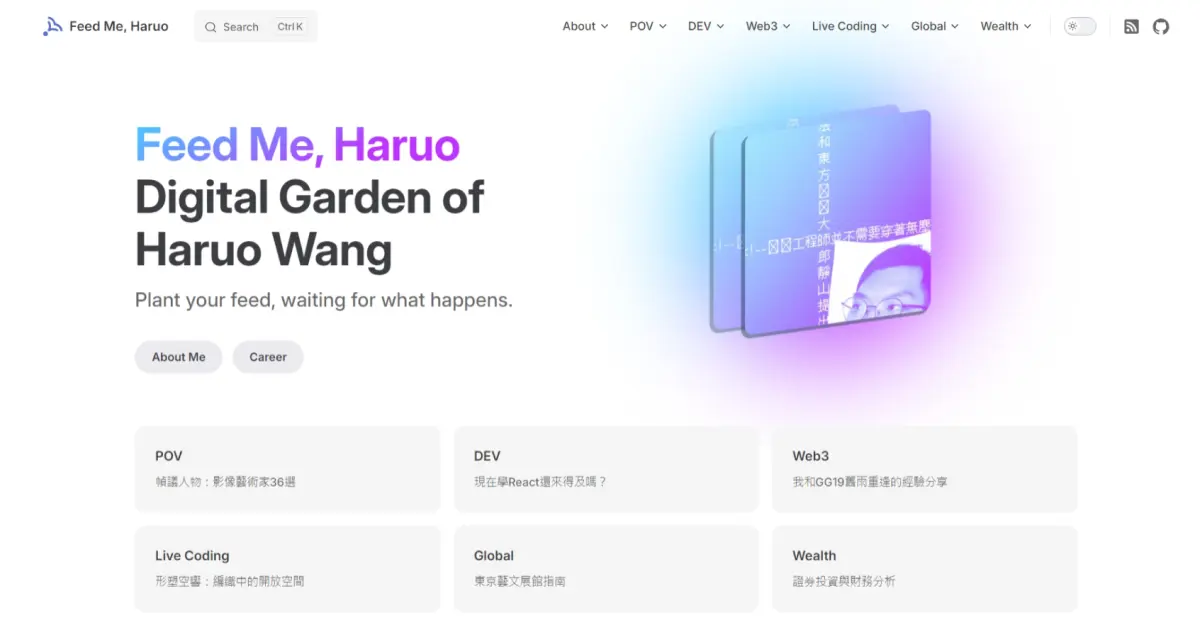
用VitePress玩轉SSG
🌿 Budding

基本設定
在終端機輸入node -v確認版本,要大於18。目前我的是18.12.1,可以使用。
之前有裝過pnpm,所以直接輸入pnpm add -D vitepress。
再來透過pnpm vitepress init進行初始化。
接下來的一連串問題我是這麼選:
┌  Welcome to VitePress!
│
◇  Where should VitePress initialize the config?
│  ./docs
│
◇  Site title:
│  Feed Me, Haruo
│
◇  Site description:
│  Digital Garden of Haruo Wang
│
◇  Theme:
│  Default Theme + Customization
│
◇  Use TypeScript for config and theme files?
│  Yes
│
◇  Add VitePress npm scripts to package.json?
│  Yes
│
└ 開始用VitePress玩轉SSG
想說保留一下Customization的可能性,所以也裝了Vue和VS Code的官方外掛Vue – Official。目前暫時還沒用到。
輸入指令pnpm run docs:dev後,便可進行開發。
基本版面
我們主要會頻繁更動的檔案,是./vitepress底下的config.mts。從網站語言、網站地圖到設定lazy loading,無所不包。
下拉選單
config.mts > themeConfig > nav > text + items
左側欄
config.mts > themeConfig > sidebar > text + items
需要多寫'/about/'、'/pov/'或'/dev/',根據路由指定使用者顯示哪個側邊欄。加上collapsed可以實作「收縮小按鈕」。
右側索引
config.mts > themeConfig > outline
outline裡可以設定level deep,讓h3也能成為索引。
另外可以用label修改預設的目錄名稱On this page。像我就改成TOC。
搜尋功能
config.mts > themeConfig > search
MiniSearch其實已經很好用了,把provider設成local就好。也可以選用Algolia,但就是要連他們家的API。
導覽列logo
config.mts > themeConfig > logo
首頁主題
style.css
- --vp-home-hero-name-background:改標題顏色
- --vp-home-hero-image-background-image:改圖片襯底顏色
<head>
標準網址宣告
config.mts > head
[
    'link',
    { rel: 'canonical', href: 網址 }
]
favicon
config.mts > head
[
    'link',
    { rel: 'apple-touch-icon', sizes: '180x180', href: '/apple-touch-icon.png' }
],
[
    'link',
    { rel: 'icon', type: 'image/png', sizes: '32x32', href: '/favicon-32x32.png' }
],
[
    'link',
    { rel: 'icon', type: 'image/png', sizes: '16x16', href: '/favicon-16x16.png' }
],
[
    'link',
    { rel: 'manifest', href: '/site.webmanifest' }
],
[
    'link',
    { rel: 'mask-icon', href: '/safari-pinned-tab.svg', color: '#5bbad5' }
],
[
    'link',
    { name: 'msapplication-TileColor', content: '#da532c' }
],
[
    'link',
    { name: 'theme-color', content: '#ffffff' }
],
OGgraph
config.mts > head
[
    'meta',
    { property: 'og:url', content: 網址 }
],
[
    'meta',
    { property: 'og:type', content: 'website' }
],
[
    'meta',
    { property: 'og:title', content: 標題 }
],
[
    'meta',
    { property: 'og:description', content: 描述 }
],
[
    'meta',
    { property: 'og:image', content: '/og-image.webp' }
],
[
    'meta',
    { property: 'twitter:card', content: 'summary_large_image' }
],
[
    'meta',
    { property: 'twitter:domain', content: 網址 }
],
[
    'meta',
    { property: 'twitter:title', content: 標題 }
],
[
    'meta',
    { property: 'twitter:description', content: 描述 }
],
[
    'meta',
    { property: 'twitter:image', content: '/og-image.webp' }
]
OGgraph這邊後來我抽出部分讓各頁用frontmatter處理,才不會每頁都只讀到首頁的資訊。
GA4
config.mts > head
reference: 只抄
[
    'script',
    {
    async: '',
    src: 'https://www.googletagmanager.com/gtag/js?id=G-XXXXXXXXXX'
    }
],
[
    'script',
    {},
    "window.dataLayer = window.dataLayer || [];\nfunction gtag(){dataLayer.push(arguments);}\ngtag('js', new Date());\ngtag('config', 'G-XXXXXXXXXX');"
]
RSS Feed
config.mts
照官方描述,先pnpm add vitepress-plugin-rss。
設定一些基本資訊後,pnpm run docs:build,在生產環境的dist資料夾裡即可找到你的rss.xml。
結果XML頁面跳出警告EntityRef。本以為把XML裡出錯那行的&改成&就好了,但實際上必須回去改原本md檔裡的網址,再重新build一次才行。
其他妙招
嵌入YT影片
style.css > 自訂class
YouTube提供的iframe沒有RWD,所以要另外寫一個div搭配CSS。
<div class="videobox">
    <iframe frameborder="0" src="嵌入連結" allowFullScreen>
    </iframe>
</div>.videobox {
position: relative;
width: 100%;
height: 0;
padding-bottom: 56.25%;
}
.videobox iframe {
position: absolute;
top: 0;
left: 0;
width: 100%;
height: 100%;
}Shield.io
因為img的設定是區塊元素,會自動換行。為了改成行內元素,沒有使用Markdown一般的圖片語法,而是直接寫img標籤。
//以GA4的Badge為例
<img src="https://img.shields.io/badge/-GA4-E37400?style=for-the-badge&logo=google%20analytics&logoColor=fff" alt="Google Analytics" style="display: inline">